Appearance
Blend Sizes
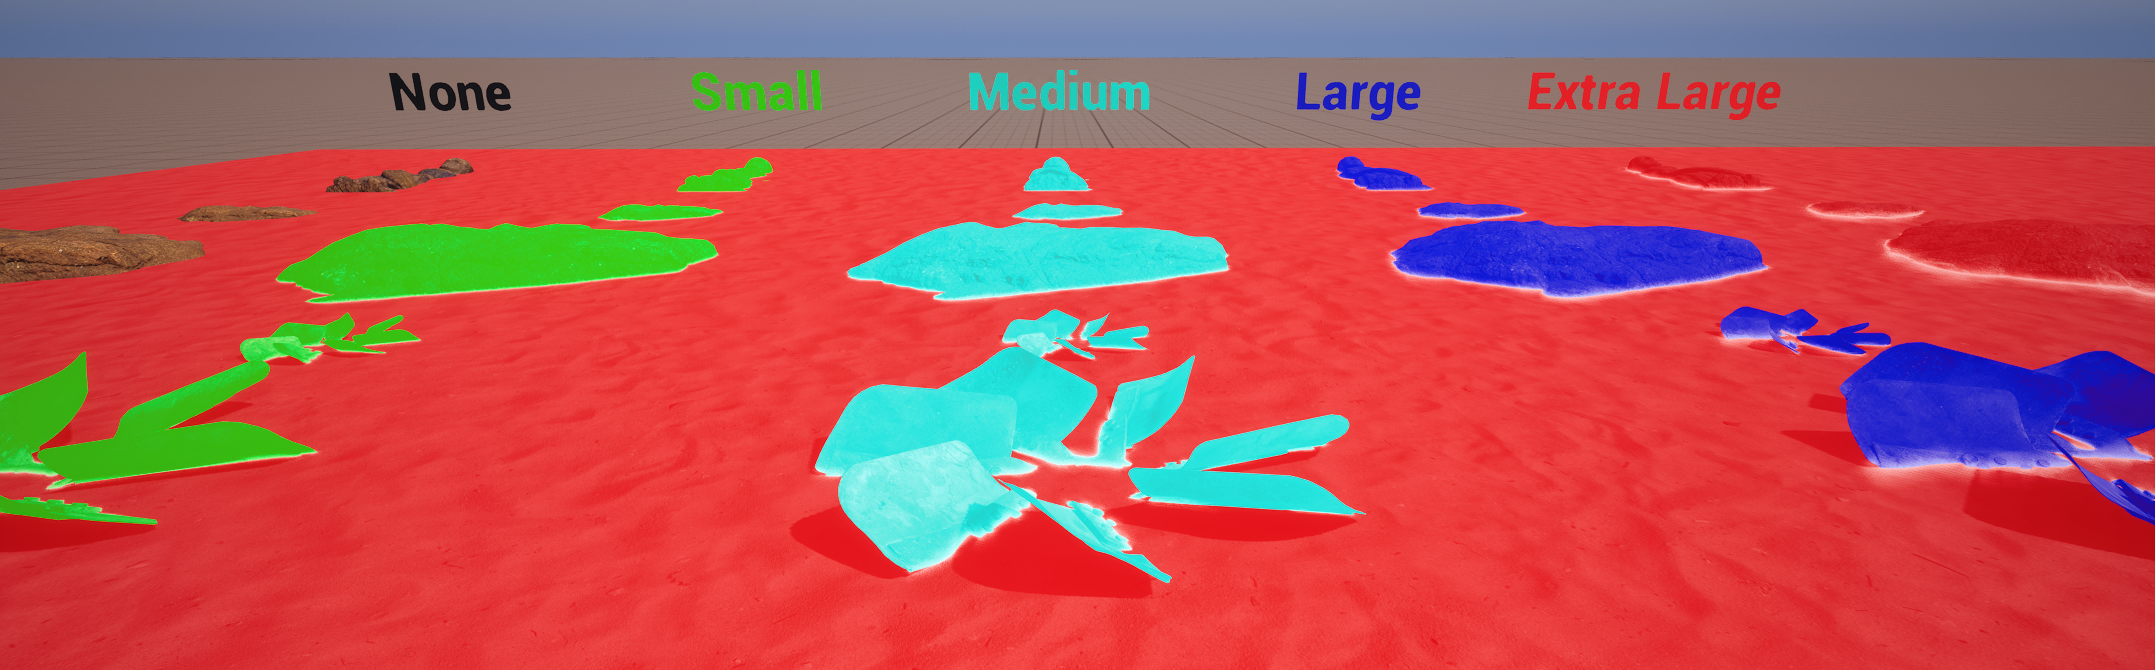
There are 4 size presets you can assign to a mesh. Small, Medium, Large and Extra Large. The blend sizes are (almost) equal to centimeters when two blending meshes lay flat next to each other. (Intersection angle, noise, contrast, etc all affect the final blend size displayed on screen.)
Debug View
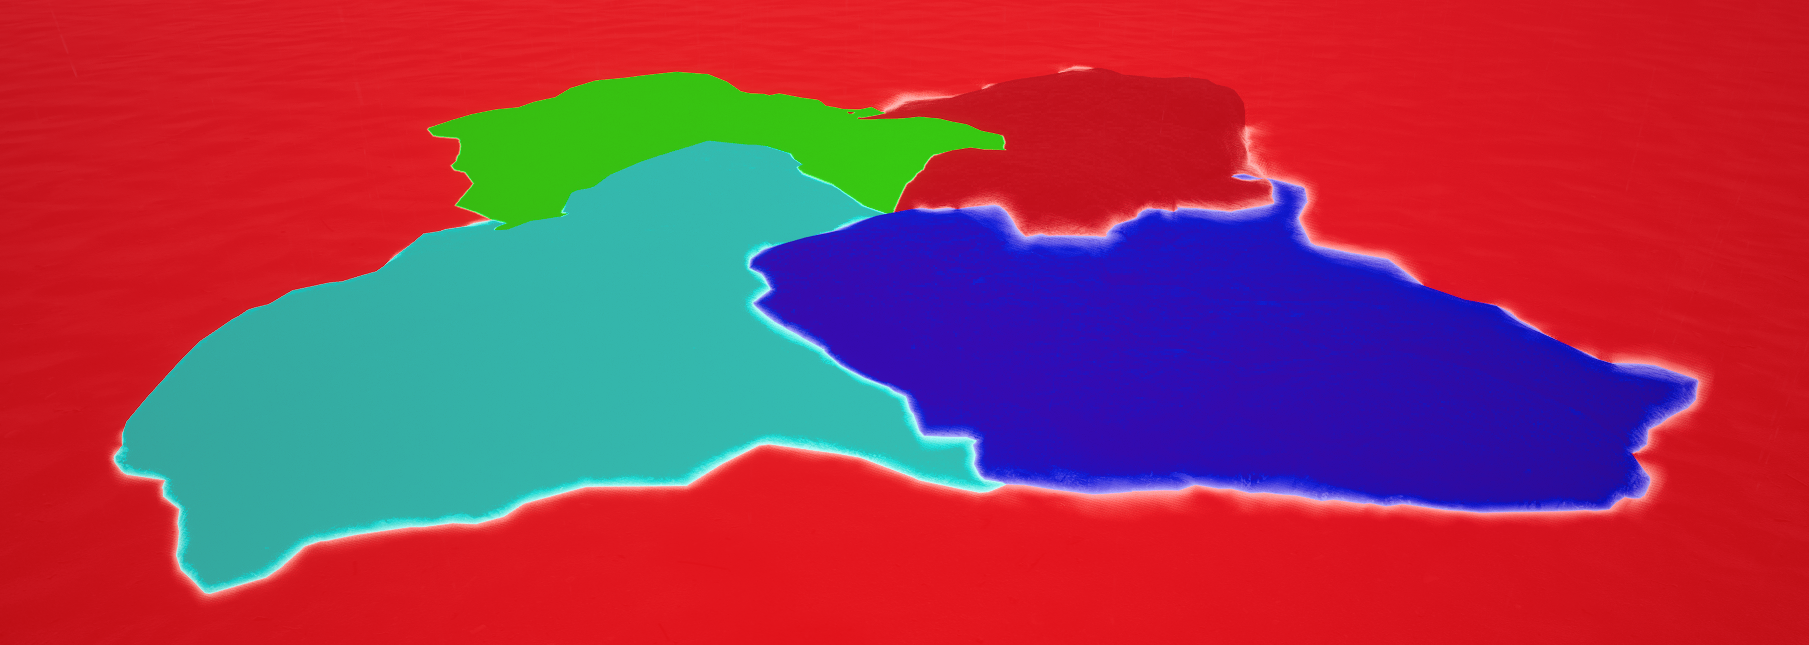
In debug view each size is colored to visualize what blend size the mesh has. Small=Green Medium=Cyan Large=Blue Extra Large=Red
When two different size meshes blend, the smaller of the two sizes is used on both sides of the seam.
Blend Presets
There are 4 preset sizes you can assign to a mesh. Small, Medium, Large and Extra Large.
TIP
Think of the sizes are categories. Your project might want to use small for "weld small items", while other will use small for "pebbles and small rocks". You have 4 general categories you can group you mesh assets in.
Changing sizes
The blend sizes can be changed with cvars. Here are the default values.
r.MeshBlend.Small.Size 6
r.MeshBlend.Medium.Size 10
r.MeshBlend.Large.Size 20
r.MeshBlend.ExtraLarge.Size 30
Min Size
MinSize is a way to adjust the percived size of a blend.
It takes some time getting "used to" thinking with min size.
With a MinSize of 2 the blend size will be the same visual size at 2000 units as it was at 1000 units.
Example A: r.MeshBlend.Small.Size 3, r.MeshBlend.Small.MinSize 10 = Can be used as a small blend to reduce a seams without blending it. (Good for roads, concrete, hard surfaces). But it stays a small blend further away also.
Example B: r.MeshBlend.ExtraLarge.Size 30, r.MeshBlend.ExtraLarge.MinSize 5 = Good for big cliffs. Up close the blend is ~30cm in world space, but 100 meter away it will be closer to 1,5 meters. This ensures the terrain seams stay blended when far away.
r.MeshBlend.Small.MinSize 1.5
r.MeshBlend.Medium.MinSize 3
r.MeshBlend.Large.MinSize 3
r.MeshBlend.ExtraLarge.MinSize 5