Settings
Console Variables
The console variables lets you adjust certain settings.
Update <Project>/Config/DefaultEngine.ini if you want the changed values to be permanent.
r.MeshBlend.Quality
- Default:
2Medium - Note: Has the
ECVF_Scalabilityflag set and can be used with scalability - Options:
1: Low - Targets low end PCs, handhelds and XBOX Series S type hardware2: Medium - Targets Medium PCs and consoles
(Good option in terms of quality/performance tradeoff)3: High - Targets High end PCs4: Cinematic - Targets offline rendering (Not to be used with real time rendering)
r.MeshBlend.[Size].Size
Set the blend size for each preset size.
The blend sizes are (almost) equal to centimeters when two blending meshes lay flat next to each other. (Intersection angle, noise, contrast, etc all affect the final blend size displayed on screen.)
r.MeshBlend.Small.Size
- Default:
6
r.MeshBlend.Medium.Size
- Default:
10
r.MeshBlend.Large.Size
- Default:
20
r.MeshBlend.ExtraLarge.Size
- Default:
30
r.MeshBlend.[Size].MinSize
The blend size is stable in world space, meaning if it's 30 cm at 1 meters away it's 30 cm at 100 meters away.
MinSize lets you tweak how the size grows after 1000 units away from the camera.
The blend size is calculated so it's 1:1 at 1000 units from the camera. By setting MinSize to 2 it pushes this so that it remains the same pixel size at 2000 unit as it did at 1000 units. It can be helpful to ensure seams blend at a distance without having to make them blend really large up close.
r.MeshBlend.Small.MinSize
- Default:
1.5
r.MeshBlend.Medium.MinSize
- Default:
3.0
r.MeshBlend.Large.MinSize
- Default:
3.0
r.MeshBlend.ExtraLarge.MinSize
- Default:
5.0
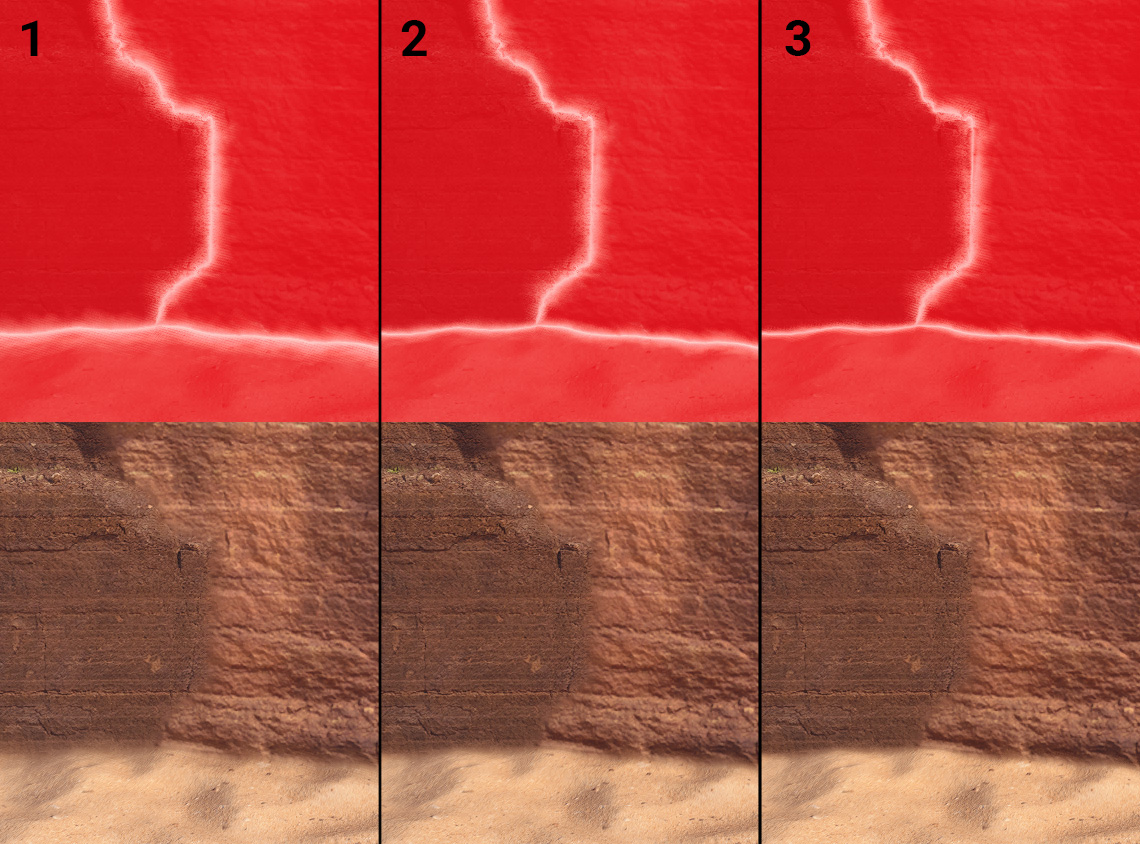
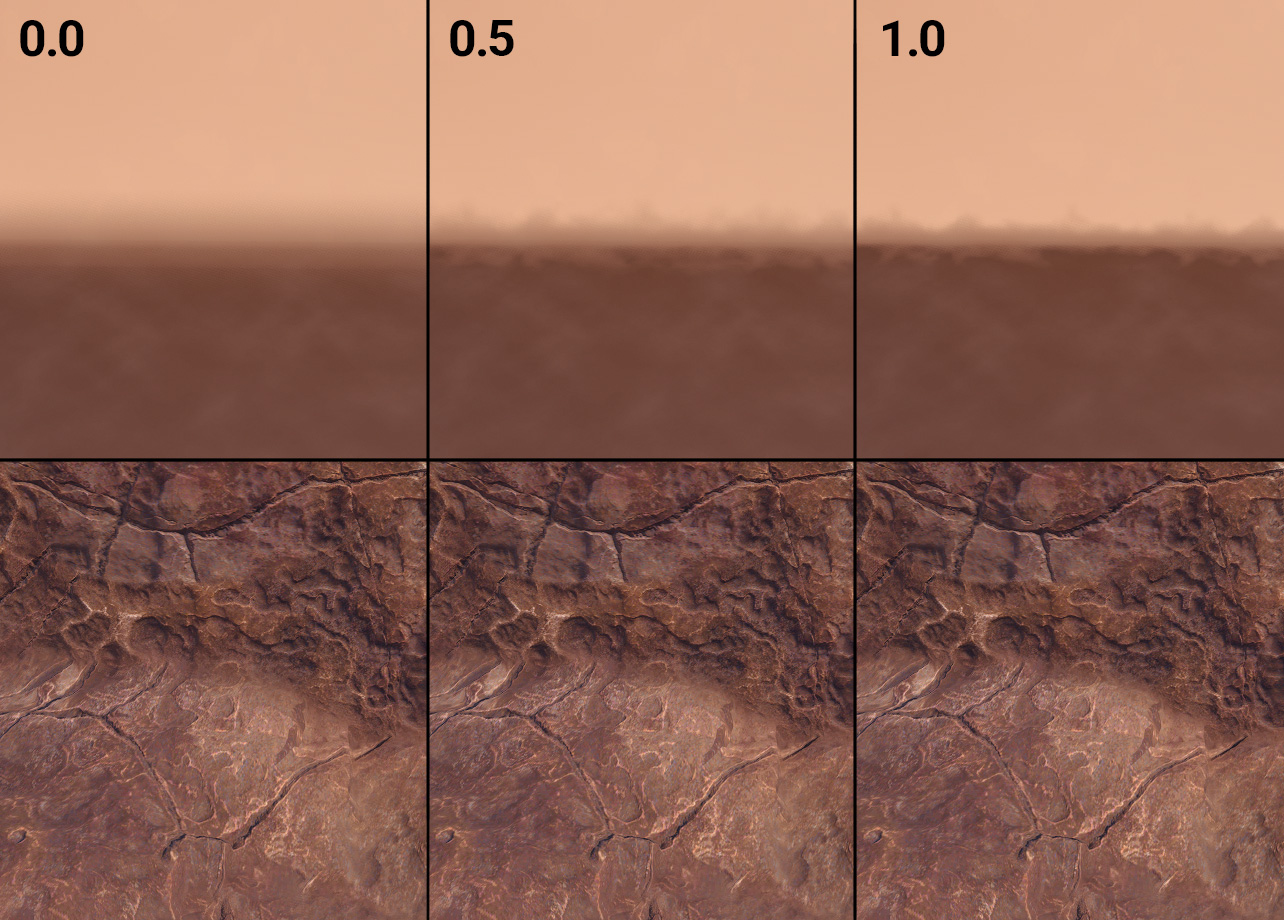
Example A - Ensure terrain blends at a distance
- Size:
30 - MinSize:
1and5
Setting MinSize to 5 the blend continues to be visible at a distance even though it's technically growing in world space.
MinSize 1 and 3 visualized
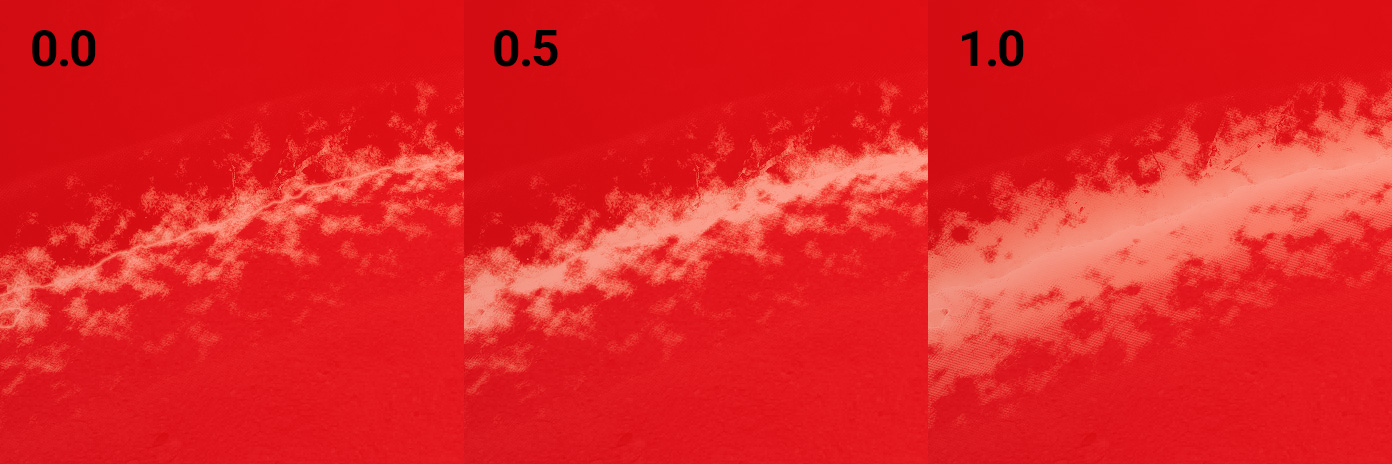
Example B - Ensure something always has a small blend
- Size:
4 - MinSize:
1and15
Setting MinSize high can make it possible to keep the blend size small, while always showing a slight blend. Good if you want to hide the seam without making it feel blended.

MinSize 1 and 15 visualized
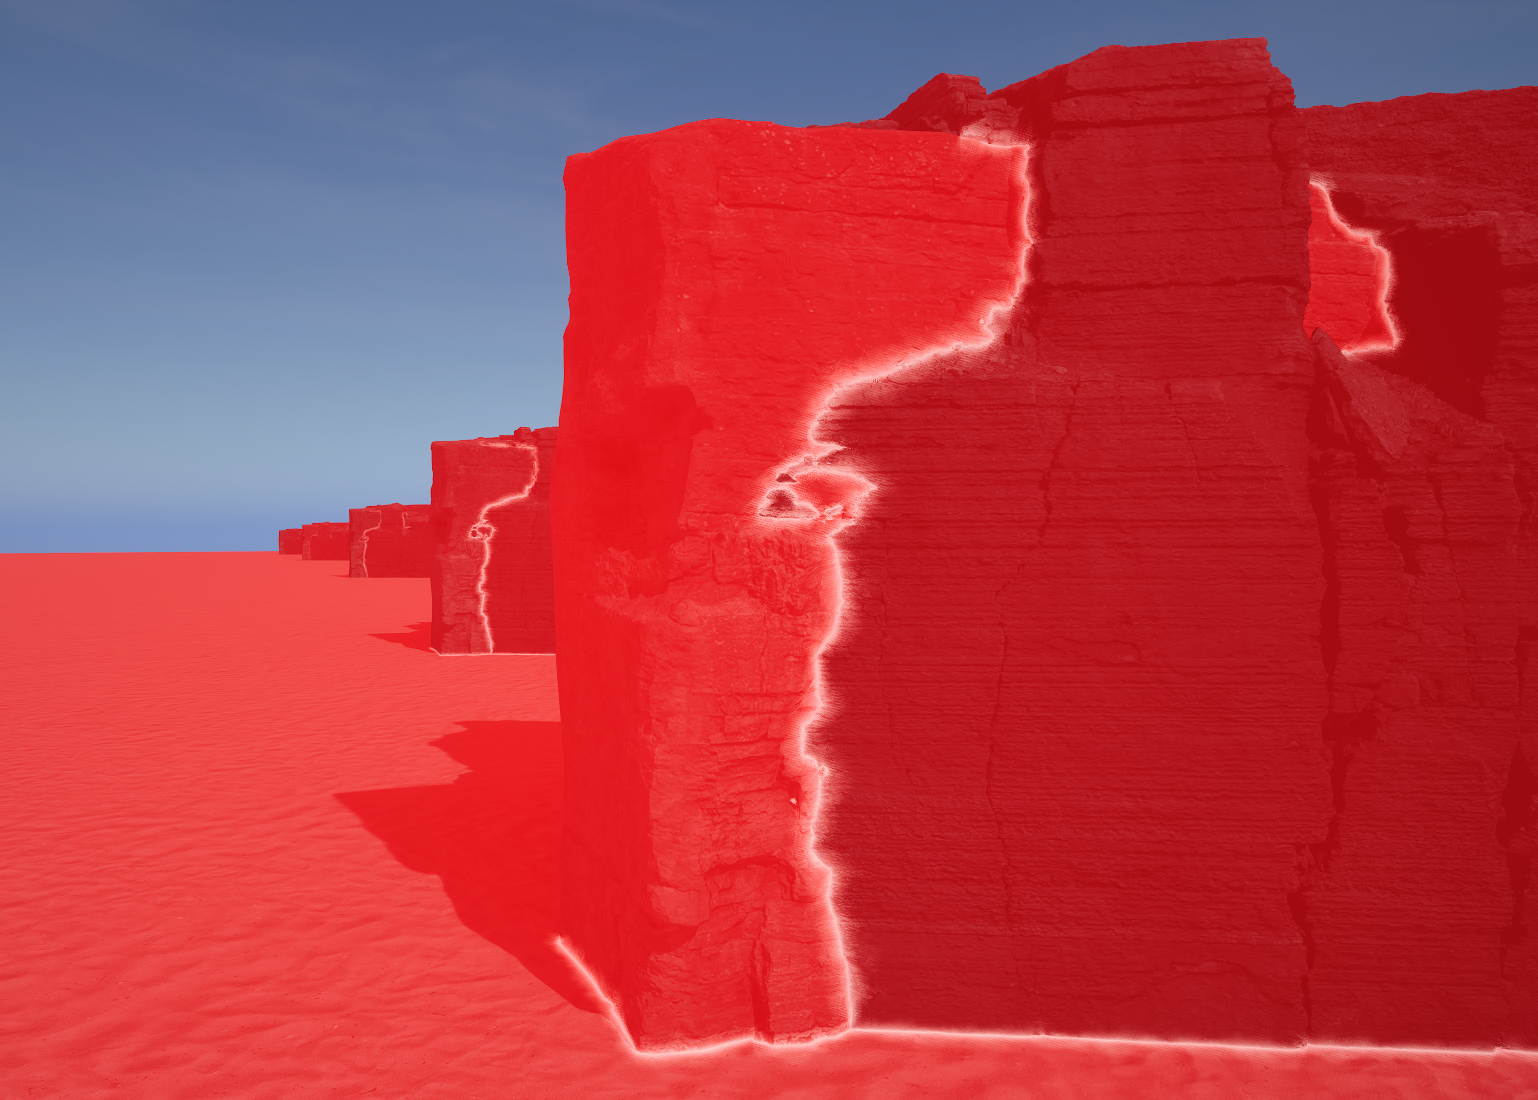
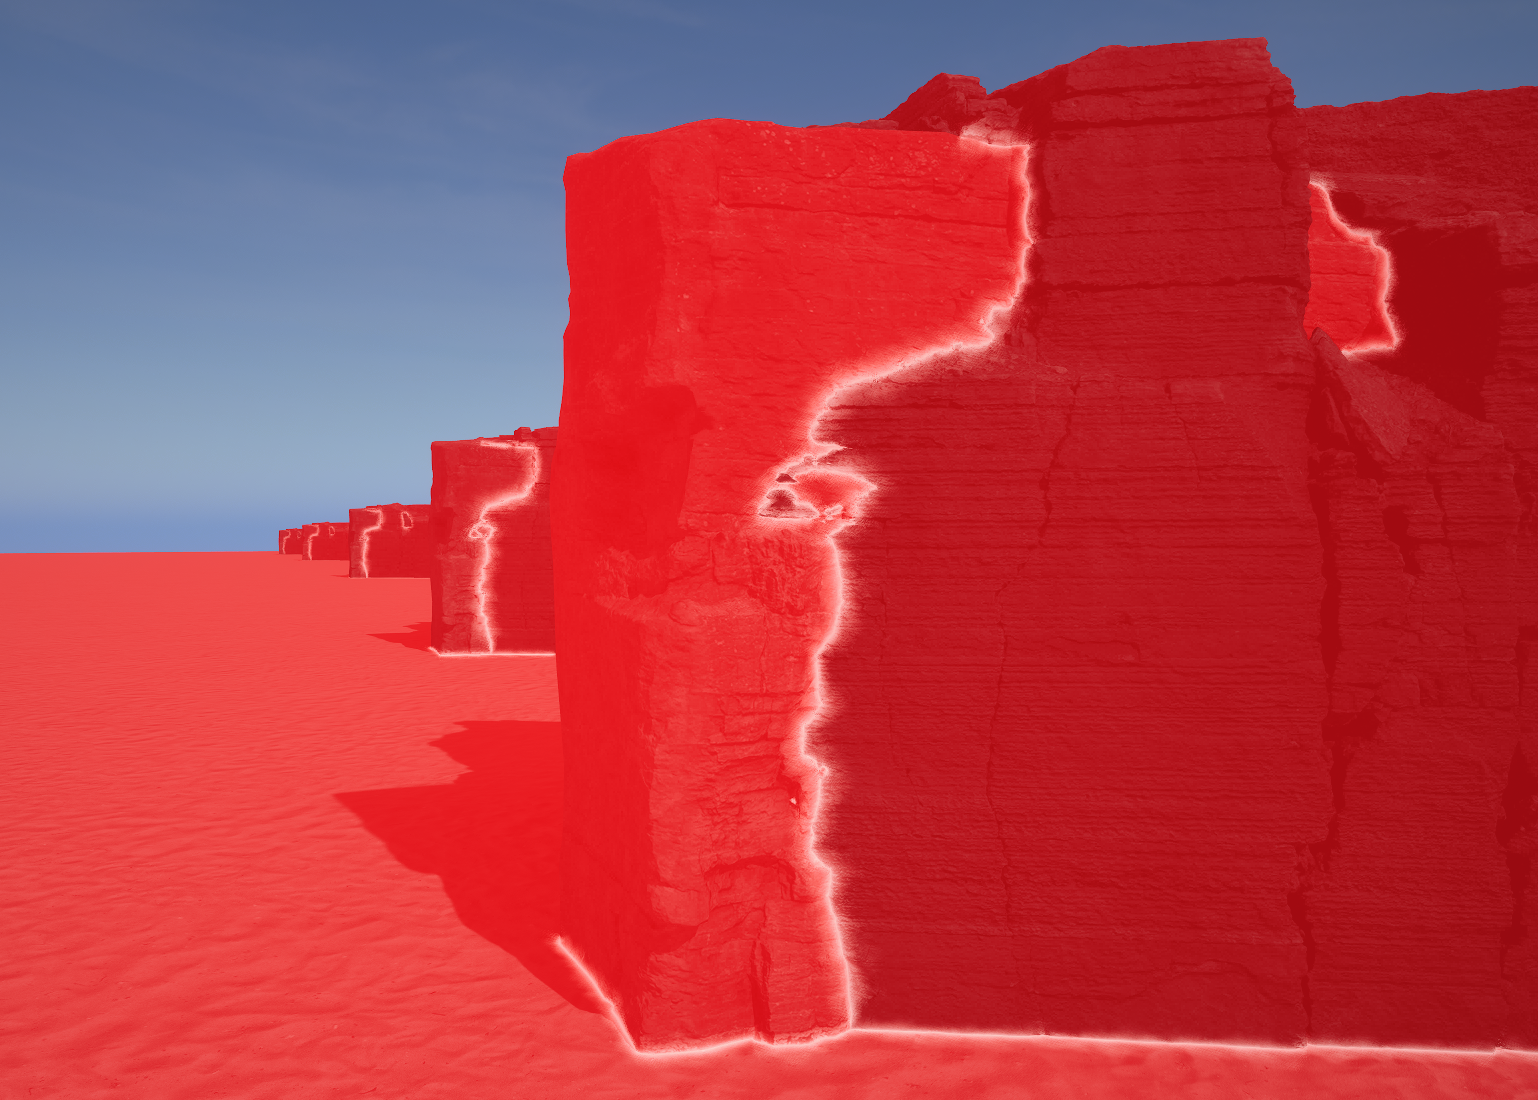
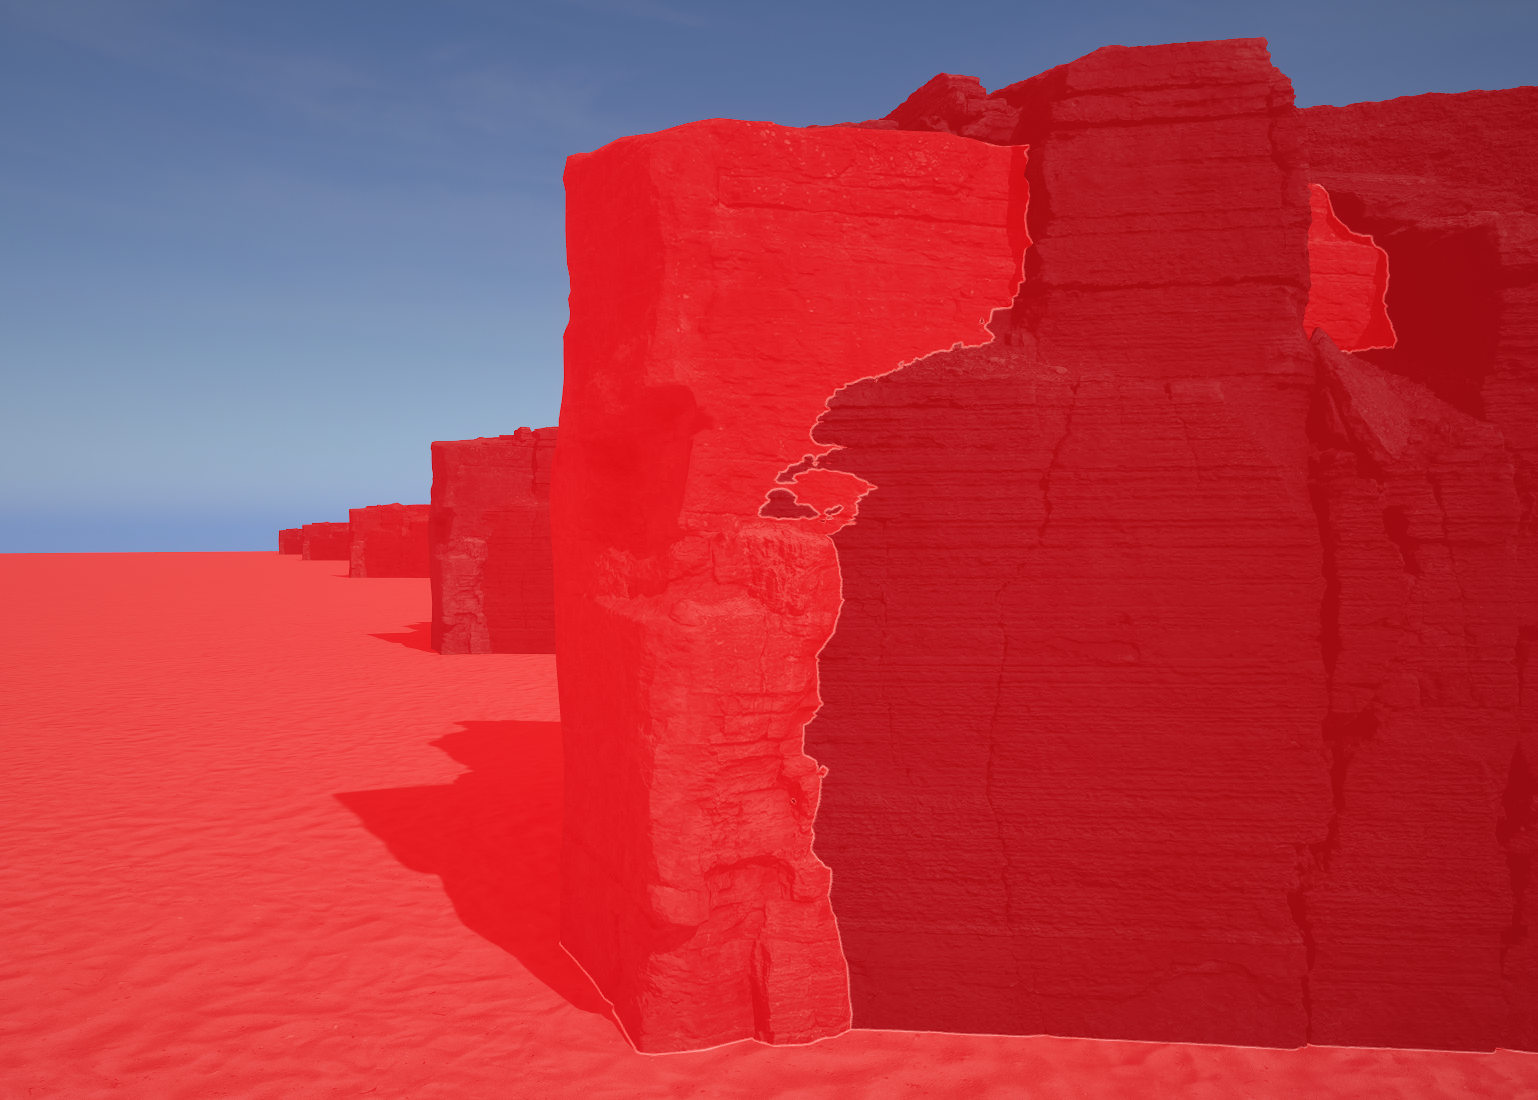
r.MeshBlend.SlopeFactor
- Default:
2.0 - Options: Value from
1.0and up.
Sets how much falloff the blend should have based on the angle of the seam. Meaning a 90 degree angle has half the blend as a flat surface with 0 degree angle at the seam.
It's a subtle effect that helps make the result more convincing.
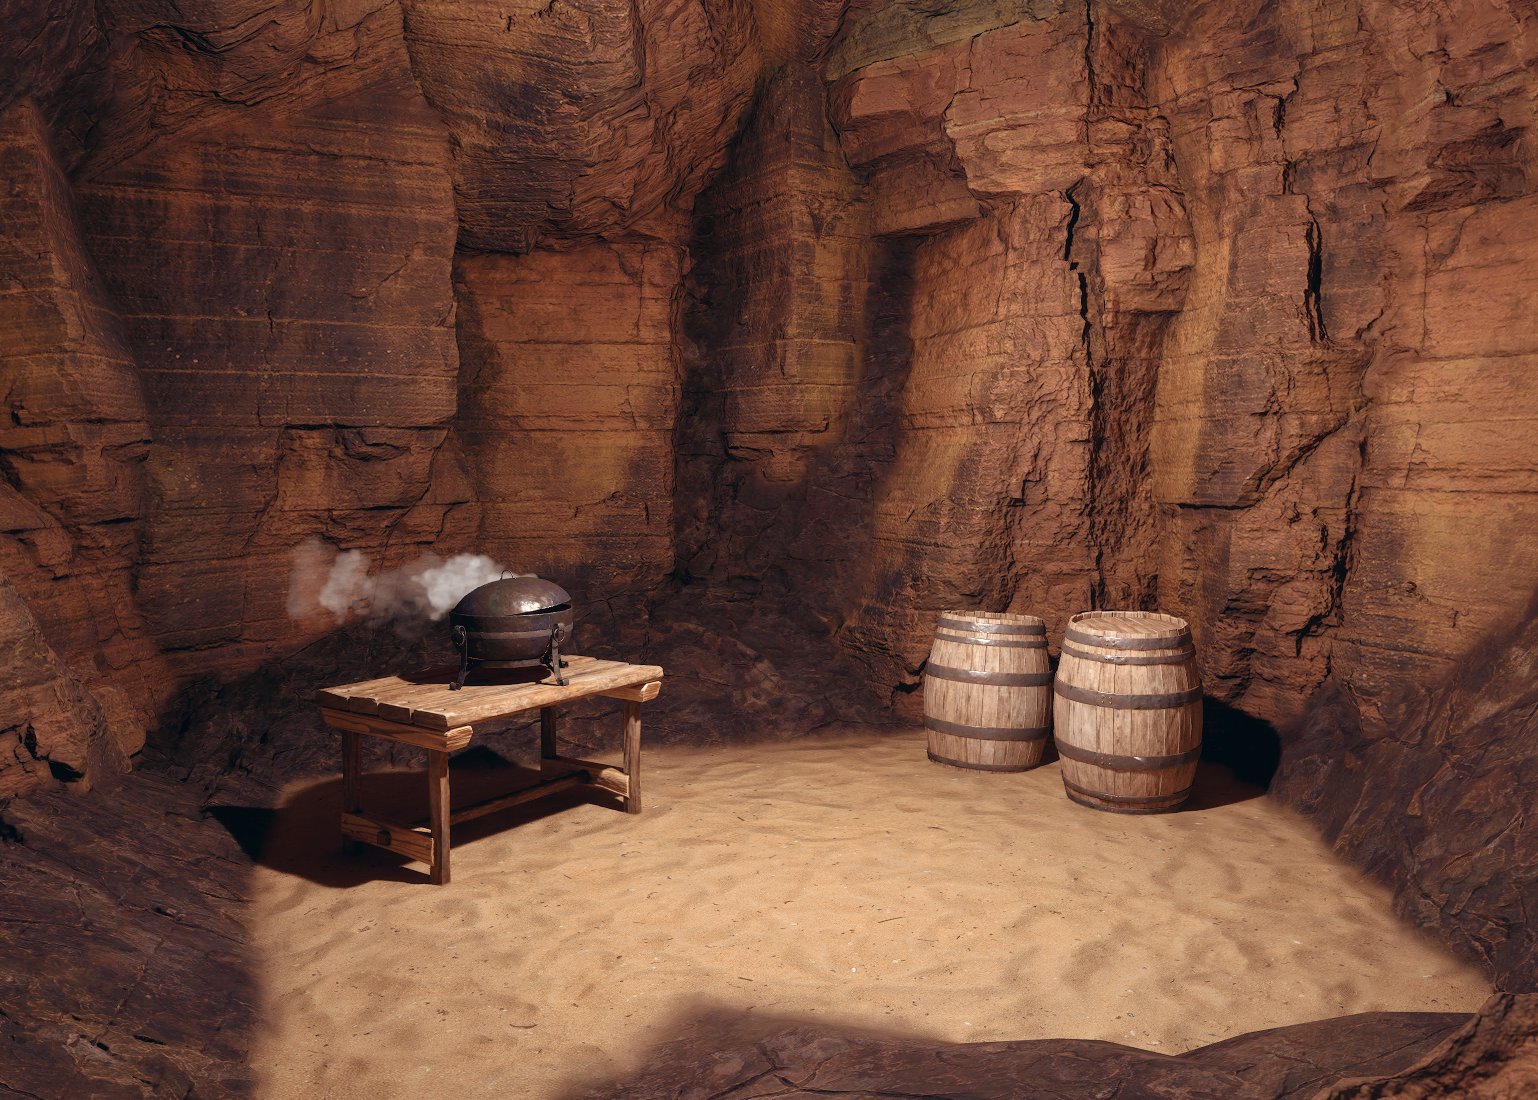
In this example the vertical seam between two rocks stays the same width creating a smooth transition, while the 90-degree seam where the rocks meet the sand is reduced.
Console Variables - Noise Texture
r.MeshBlend.NoiseFactor
- Default:
0.5 - Options: Value between
0.0and1.0
Sets how much influence the noise texture has on the blending.
The noise pattern tries to make the blend look natural and aims to break any linear feel to it. While it works good in many use cases, there is probably potential for more stylized noise effects in the future.
r.MeshBlend.NoiseFade
- Default:
0.5 - Options: Value between
0.0and1.0
Sets how much, from the seam, that the noise should fade. 0 means no fade. 1 means fade from seam to edge.
r.MeshBlend.NoiseOffset
- Default:
0.0 - Options: Value between
-1.0and1.0
Offsets the noise value (NoiseValue + NoiseOffset) to either increase or decrease it's influence.
r.MeshBlend.NoiseTexture
- Default: ``
- Options: Texture asset path
Sets a custom noise texture to be used.
r.MeshBlend.NoiseTileSize
- Default:
10 - Options: A positive value
Sets the tiling of the noise texture.
r.MeshBlend.Enable
- Default:
1 - Options:
0or1
Toggle the plugin effect and activator off or on.
r.MeshBlend.Visualize
- Default:
0 - Options:
0: Visualization off1: Visualize blend edges (white) and blend sizesSmall=Green, Medium=Cyan, Large=Blue, Extra Large=Red
Debug views for the plugin.
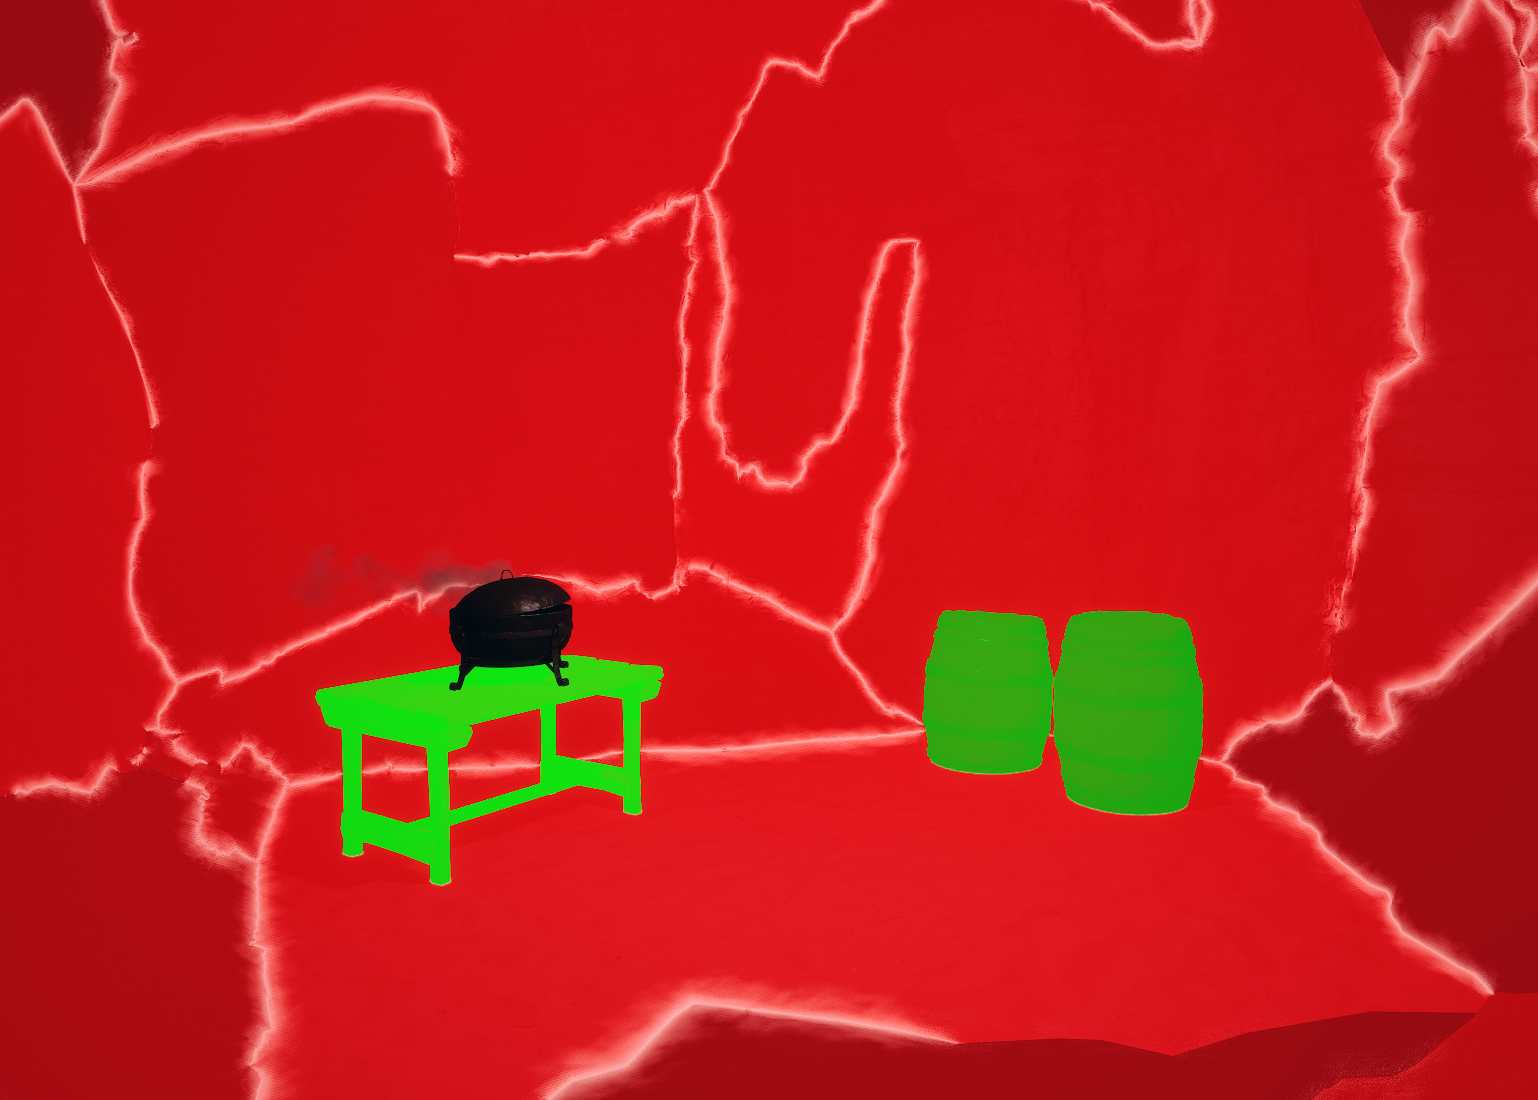
Visualization On/OFF
r.MeshBlend.ProcessBudget
- Default:
0.3
The activator system ensures each mesh component in the scene has a blend ID. The blend ID is encoded into the Custom Primitive Data (Static Meshes), and Per Instance Custom Data (Instanced Static Meshes) for each component.
To ensure no frame hitching this processing operates on a strict max processing budget per tick.
The blend IDs are encoded at packaging, so the activator system mostly idles in a packaged game.
NOTE
Setting r.MeshBlend.DisableRestrictions 1 disables this budget.
r.MeshBlend.DisableRestrictions
- Default:
0 - Options:
0: Off1: Disable any per tick budget restrictions
Used for offline cinematics like Sequencer where you want every mesh to be activated from the very first frame. Enabling this disables the tick budget on the MeshBlend Activator Actor.
When using the Movie Render Queue you should always set r.MeshBlend.DisableRestrictions 1
Advanced/Experimental Console Variables
r.MeshBlend.FrameDither
- Default:
1 - Options:
0or1
Toggles if the plugin should dither the sampling position per frame. Useful if you are using a non-temporal AA like FXAA or SMAA.
NOTE
The initial release of the plugin has the best visual look with temporal AA solutions like TAA, TSR, DLSS, DLAA and FSR.